Attached Cursors
There are up to two attached cursors per plotting pane available. You can attach a cursor to a trace by left mouse clicking on the trace label. You can attach both cursors to a single trace by right clicking on the trace label and selecting "1st & 2nd". You can also attach the 1st or 2nd cursor or both cursors to any trace by right clicking on that trace's label and using the Attached Cursor drop down box. The attached cursors can be dragged about with the mouse or moved with the cursor keys.

When there are active attached cursors, a readout display becomes visible that will readout the data at the cursors and report the difference.

Note that there is also mouse cursor readout independent of the above attached cursor readout. As you move the mouse over the waveform window, the mouse position is readout on the status bar. If you drag the mouse as if you were going to zoom, the size of box is displayed on the status bar. This lets you quickly measure differences with the mouse cursor. If the horizontal axis is time, then this time difference is also converted to frequency.
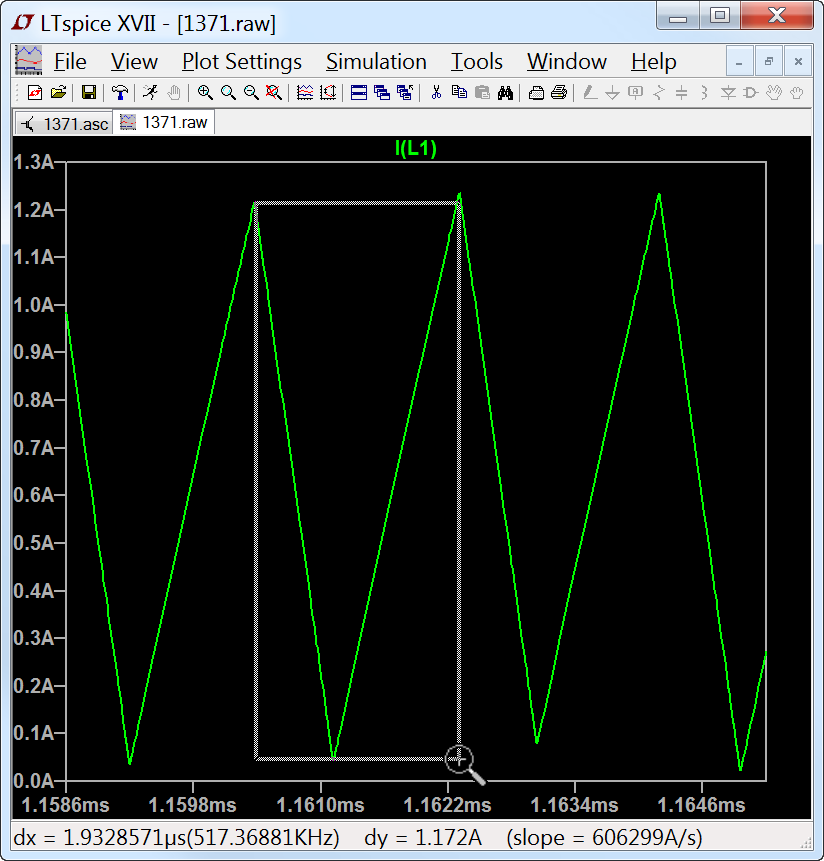
You can measure differences in this manner without performing the zoom by either pressing the Esc key or right mouse button before releasing the left mouse button.
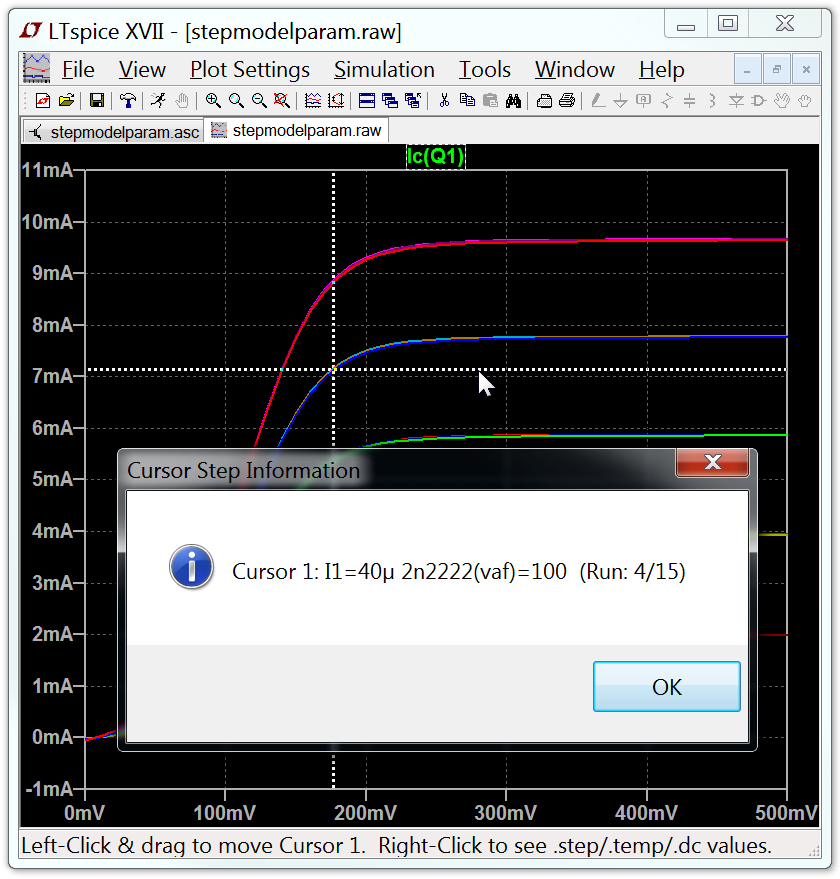
The attached cursors can also be used to readout which trace belongs to which run of a .step/.dc/.temp set of simulation runs. You can navigate the cursor from dataset to dataset with the up/down keyboard cursor keys and then right-click on the cursor to see the step information for that run.